Red velvet are the most problematic cakes for me. I can't get them just right at this altitude. I think it's a combination of leavening issues, flour structure issues, and weird chemical reactions of the acidic ingredients (vinegar, buttermilk and even natural cocoa powder) with the baking soda. I've been experimenting with a high altitude red velvet cupcake recipe and although I am not completely satisfied, it works (sort of) and tastes delicious. The cupcakes need additional experimenting but the cream cheese frosting is perfect.
I made a batch using my adjusted recipe from last year and then I made a batch subbing all purpose flour for cake flour. I had to remind myself why I wanted to make cake flour work at high altitude. The crumb is much better. The recipe below will still result in subtly sunken middles, but the trade off in texture is worth it. I'll experiment with mixing cake and all purpose flours next time. I cannot look at another red (or aqua) velvet cupcake at the moment.
High Altitude Red Velvet Cupcakes
2 1/2 cups plus 3 tablespoons cake flour
1 teaspoon baking powder
1 teaspoon salt
2 tablespoons natural cocoa powder
1/4 teaspoons red gel food coloring
4 tablespoons unsalted butter
4 tablespoons canola oil
1 1/4 cups sugar
2 large eggs, at room temperature
1 teaspoon vanilla
1 cup buttermilk, room temperature
1 teaspoon white vinegar
scant teaspoon baking soda
1. Preheat oven to 350 degrees. Line two 12-cup cupcake tins with liners.
2. Sift together flour, baking powder, cocoa and salt in a medium bowl. Set aside.
3. Beat together butter, oil and sugar until light and fluffy.
4. Beat in eggs, one at a time and then beat in vanilla and food coloring. Remove from stand mixer.
5. Add half the flour mixture to the butter mixture. Using a spatula, fold until incorporated. Add half of the buttermilk, fold and finally add the last of the buttermilk and fold.
6. Mix vinegar and baking soda and add to the batter. Fold to mix.
7. Fill cupcake tins half full. Bake in a single layer on middle rack of oven for about 20 minutes.
8. Cool completely before frosting.
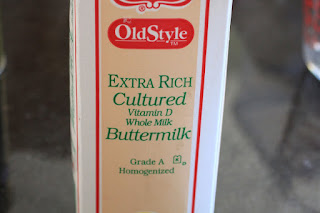
I used whole milk buttermilk this time but I've made it with low fat buttermilk and it worked fine.
The aqua cupcakes were made with all purpose flour. Note to self: Do not add the additional 3 tablespoons of flour. The cracked tops means too much flour.

The red cupcakes were made with cake flour. Cake flour + high altitude = craters.

So I broke down and piped the frosting on instead of my usual slather method. (See why I do not pipe? I'm not very good at it.) I wanted to test the bag-strip method from Wilton. I took a small brush, dipped it in the gel food coloring and brushed four vertical lines on the inside of a disposable piping bag. I then carefully filled the bag with the pipeable cream cheese frosting (recipe below). The frosting will come out striped. I think I used too much food coloring but the results were not too bad for my first attempt. I used a Wilton 1M tip (a favorite of many cupcake decorators). I picked it up at Hobby Lobby because I couldn't find a comparable tip in my collection of Ateco and Magic Line tips.
The cream cheese frosting recipe below is basically the Barefoot Contessa's recipe with a few adjustments to make it pipeable. The butter should be room temperature but the cream cheese should be cold.
Pipeable Cream Cheese Frosting:
3 sticks unsalted butter, room temp
1 teaspoon vanilla
1/2 teaspoon almond extract
2 pounds powdered sugar
1 pound (2 bricks) cream cheese, cold
In the bowl of an electric mixture, cream together butter vanila and almond extract. Add powdered sugar and continue creaming until mixed. Add cream cheese and mix until light and fluffy.
Store frosting in refrigerator. Remove frosting from refrigerator about 30 minutes before piping.


No comments:
Post a Comment