Be prepared for a series of posts about my adventures in canning. I've spent the summer and part of fall learning about water bath canning.
One of my coworkers had an abundance of apples so after spending a weekend making apple butter and apple jelly, she left me a box of apples for pie filling. After doing some research, I discovered that I needed something called ClearJel in order to safely can the apples. ClearJel is difficult to find in stores so I ordered it.
My order took longer than expected to ship. By the time I got the Clear Jel, the apples from my coworker were pretty mealy so I abandoned the whole canning pie filling idea and made apple sauce instead. It was a great idea because the apples were perfect for apple sauce. I used some for pie and the flavor was too one dimensional. I prefer apple pie made with a combination of different types of apples.
After making apple sauce, I went out and bought apples for the pie filling. I used the trusty Granny Smiths and combined them with some Braeburns and Jonathans. I wished we had Gravenstein, Spy, Macoun, and other great pie apples out here but we don't so I had to make do. We do get Honey Crisps and Pink Lady apples but those are my eating fresh varieties.
One of my coworkers had an abundance of apples so after spending a weekend making apple butter and apple jelly, she left me a box of apples for pie filling. After doing some research, I discovered that I needed something called ClearJel in order to safely can the apples. ClearJel is difficult to find in stores so I ordered it.
My order took longer than expected to ship. By the time I got the Clear Jel, the apples from my coworker were pretty mealy so I abandoned the whole canning pie filling idea and made apple sauce instead. It was a great idea because the apples were perfect for apple sauce. I used some for pie and the flavor was too one dimensional. I prefer apple pie made with a combination of different types of apples.
After making apple sauce, I went out and bought apples for the pie filling. I used the trusty Granny Smiths and combined them with some Braeburns and Jonathans. I wished we had Gravenstein, Spy, Macoun, and other great pie apples out here but we don't so I had to make do. We do get Honey Crisps and Pink Lady apples but those are my eating fresh varieties.
Here are the apples from my coworker. I don't know the name of these apples but I assume they're probably a variety that does well in Colorado.

I used one of those nifty apple peeler/slicer/corer thingamajig to save time. I wish I was able to adjust the thickness of the slices because I wanted them to be a little thicker.

The peels and cores from when I made apple sauce and when I made apple pie filling. I boiled them down and made pectin. The first batch with the mealy apples made a poor pectin.


This recipe uses a product called Clear Jel sold under the brand name ClearJel. Clear Jel is a modified corn starch and is the only USDA recommended thickener for canned pie fillings.
Clear Jel is used in almost all commercially prepared fruit pie fillings and used by many home canners who care about safe canning. I’m a safe canner. (I’m HACCP certified. It was part of the food safety and sanitation class we were required to take.) I know many people swear that they have been using the same recipe for 30 years without any ill effects. But I don’t want to be the person who poisoned or killed a friend or family member with strawberry jam.
The reason why it is not safe to use regular cornstarch or tapioca starch is because the thickeners thicken the product while it is being heat processed and therefore inhibiting the product from reaching the correct temp to kill the bacteria. I never cared for cornstarch as a thickener because to me, it is considered an inferior thickener. It produces clear sauces that break down with prolonged (ten minutes) heating. That’s why gravies separate and become watery when reheated. Tapioca and arrowroot are better thickeners but also not safe for canning.
I pretty much followed the recipe on this website. I think they know a thing or two about canning. http://www.pickyourown.org/applepiefilling.htm
The only thing I did differently was use all water instead of apple juice and used a baking spice mix from my local spice shop supplemented with some freshly grated nutmeg instead of the list of spices they used. I also tripled the amount so instead of the 7 quarts, I got about 20 quarts and one half liter. (I'm mixing quarts and liters because I used a Bormioli Rocco Quattro Staglioni jar because I didn't have enough apples to fill a full quart.)
Canned Apple Pie Filling:
5 gallons of peeled, cored and sliced apples (use a variety of apples)
9 cups sugar
6 tablespoons baking spice mix
freshly grated nutmeg
22.5 cups water (just over 5 and a half quarts)
4 cups Clear Jel (I used slightly less because I didn't want the filling to be too thick)
1 1/2 cups bottled lemon juice (use more or less depending on the tartness of your apples)
Clear Jel is used in almost all commercially prepared fruit pie fillings and used by many home canners who care about safe canning. I’m a safe canner. (I’m HACCP certified. It was part of the food safety and sanitation class we were required to take.) I know many people swear that they have been using the same recipe for 30 years without any ill effects. But I don’t want to be the person who poisoned or killed a friend or family member with strawberry jam.
The reason why it is not safe to use regular cornstarch or tapioca starch is because the thickeners thicken the product while it is being heat processed and therefore inhibiting the product from reaching the correct temp to kill the bacteria. I never cared for cornstarch as a thickener because to me, it is considered an inferior thickener. It produces clear sauces that break down with prolonged (ten minutes) heating. That’s why gravies separate and become watery when reheated. Tapioca and arrowroot are better thickeners but also not safe for canning.
I pretty much followed the recipe on this website. I think they know a thing or two about canning. http://www.pickyourown.org/applepiefilling.htm
The only thing I did differently was use all water instead of apple juice and used a baking spice mix from my local spice shop supplemented with some freshly grated nutmeg instead of the list of spices they used. I also tripled the amount so instead of the 7 quarts, I got about 20 quarts and one half liter. (I'm mixing quarts and liters because I used a Bormioli Rocco Quattro Staglioni jar because I didn't have enough apples to fill a full quart.)
Canned Apple Pie Filling:
5 gallons of peeled, cored and sliced apples (use a variety of apples)
9 cups sugar
6 tablespoons baking spice mix
freshly grated nutmeg
22.5 cups water (just over 5 and a half quarts)
4 cups Clear Jel (I used slightly less because I didn't want the filling to be too thick)
1 1/2 cups bottled lemon juice (use more or less depending on the tartness of your apples)
1. Wash and sterilize jars.
2. Prep apples by washing, peeling, coring, and slicing. Soak apples in a mixture of water and citric acid or lemon juice.
3. Blanch apples in batches for about one minute. Reserve blanching water and use for making your filling liquid.
4. Make the filling liquid by combing water, sugar, spices. Heat the liquid. When it comes to a boil, combine Clear Jel with lemon juice to make a slurry. Add the slurry to the boiling liquid. Boil one minute and remove from heat.
5. Fill the sterilized jars by alternating layers of apples and liquid. (I tried filling with apples and then with liquid. It doesn't work. The liquid is thick enough that it doesn't really seep nicely.) Pack the jars tighly with apples. Who wants a mostly thickened liquid pie? Leave about half an inch to and inch of space. There will be some expansion while processing. Remove air bubbles. Clean rims (and in my case outsides of jars) and place lids and bands.
6. Process in a water bath for 25 minutes. (I processed for an additional 10 minutes because I live 5,280 feet above sea level.)
What I learned:
- Triple batch of apple pie filling takes a long time and should not be tackled on a school (work) night. I was up until 1 AM and making pie filling and baking two cakes for class.
- Wide mouth jars are my friend.
- Italian canning jars are strange, especially when you fll them too much. The lid almost exploded off. It was nicely rounded when I took it out of the canner. I thought I would have to use the jar right away because there was no way it would properly seal. I woke up in the morning and the lid was nicely flat and sucked back in and it sealed. Yay!
- Large quart size jars probably will not all seal right away like little pints and half pints. I went to bed thinking that after canning over a hundred jars of jam, this was my first batch with less than 100% sealing success rate. (The unsealed jars were Kerr brand. All of the Ball jars sealed within half an hour.) I woke up in the morning and the two remaining jars were sealed. Yay for maintaing a 100% sealing success rate!
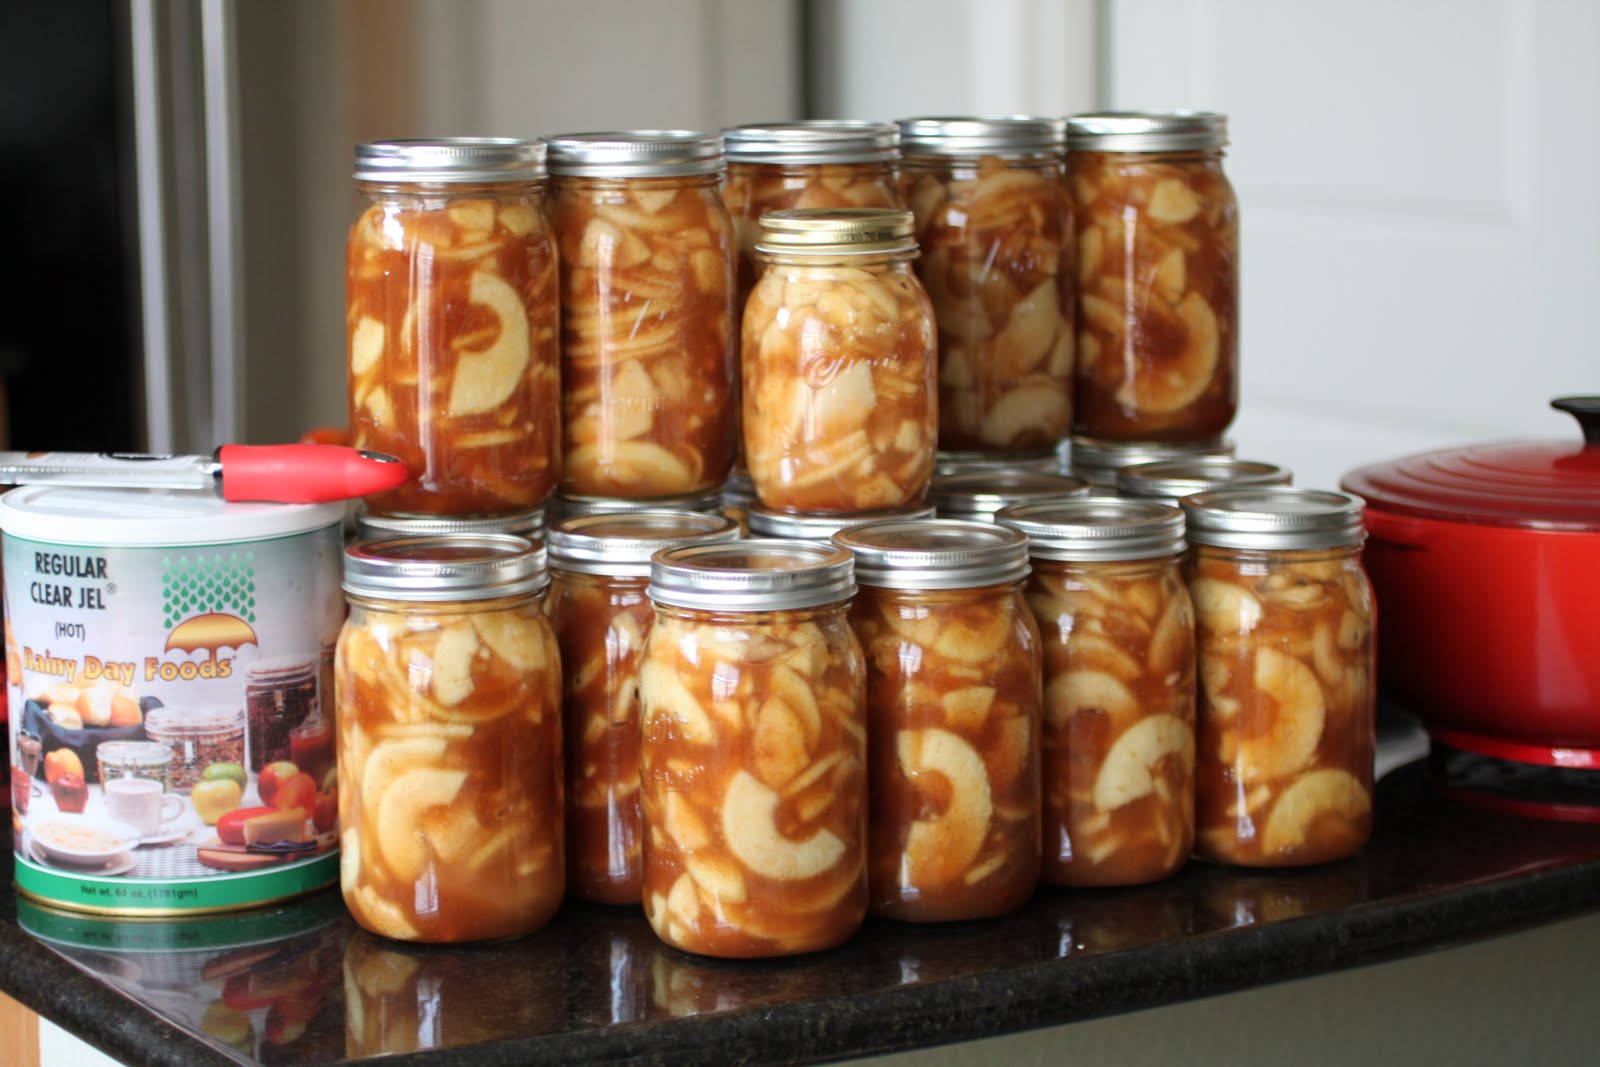
I think the jars of apple pie filling are just gorgeous. The apple slices are nicely suspended in the Clear Jel -- No floating apple pieces above a layer of sauce. The Clear Jel is supposed to last indefinitely so I have a number 10 can of it plus a smaller can of instant Clear Jel. I'm excited to try a fresh strawberry pie using instant Clear Jel.